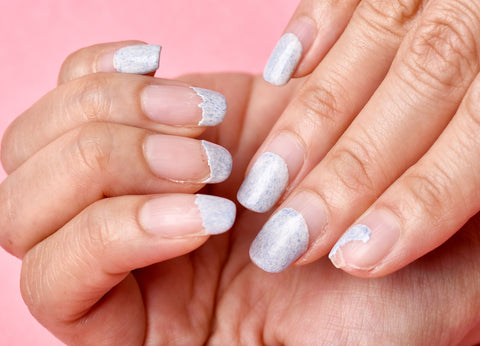
Practice makes perfect, as they say, and it's okay for you to make mistakes. For newbie nail techs, acrylic nails can be tricky. Read our in-depth acrylic guide if you want to know the basics about acrylic nails.
Mistakes are inevitable in every nail tech journey but learning from those mishaps can make you grow and be a better nail professional in the future. Here are the top mistakes nail professionals make when doing acrylic nails.
Here are the top acrylic nails mistakes:
1. Not letting your nails breathe

There's nothing wrong with loving acrylic nails, and we don't blame you for wanting to have a fresh nail acrylic set often; however, your nails have got to breathe as well. Acetone dehydrates your nails and adding on to retouch layers too frequently may leave your nails parched and brittle.
We suggest letting your nails breathe in between sessions; take the time to adore checking out acrylic nail designs on our Instagram page or Facebook community.
2. Over buffing your nails

Buffing is an essential step during nail prep since excessive buffing and filing will weaken your nails, making applying acrylic nails harder, and there's a high chance it will not last long. You can read our nail prep starter guide to learn about prepping your nails the right way, from gel nails to acrylic nails.
3. Incorrect product storage

It's important to store your nail products at a safe and normal temperature. You can read our blog on how to organize your nail desk to get ideas on where you can store your favorite nail goodies.
-
Too Hot. Stored in Direct Sunlight:
-
Polymerization.
Polymerization is a fancy term for having high viscosity - a thick, sticky consistency between solid and liquid. If this happens, your monomer is most likely spoiled, and you want to avoid that from happening. -
Too Cold. Thick Consistency.
Place the acrylic bottle in warm water and shake the bottle thoroughly when this occurs.
4. Not replacing nail lamp light bulbs

Depending on the type of nail lamp you're using, it could last around 50,000 hours of UV/LED life. However, you also have to consider not overcharging or damaging the cord. Check the bulbs every now and then if all light bulbs are working. If you need a new nail lamp, here's our roundup on our stylish UV/LED nail lamps.
5. Uneven nail surface or length

Lopsided nails don't look good when doing acrylic nails since the application will be uneven; you can take the time to shape and attach your nail tips correctly to avoid uneven application.
6. Uneven acrylic layers

It must be thin near the cuticle and thicker near the middle and the ends. (Thickness Limit: Business Card)
Hard Dabbing. We are sometimes so excited that we press down too hard. However, remember that the goal is to get a smooth and even layer.
7. Using incompatible Monomers for your Acrylic powder

More highly pigmented colors like our own require a slow-setting compatible monomer. iGel Beauty monomers match our powders. If you're using an incompatible monomer, it may cause marbling, yellowing, and dries too fast when you're applying acrylic.
8. Drippy or dry Acrylic bead

Gently dip your brush, and remove the monomer just right so the liquid is evident: not drippy, but still wet like damp hair from the shower.
-
Wet Bead. Too Much Monomer.
Effect: a weak runny structure: the bead is difficult to pick the bead up.Warning: When exposed to too much monomer, you or your client may develop an allergic reaction. Hence, this also occurs when the monomer is mistakenly used as a primer beforehand.
-
Dry Bead. Too Little Monomer.
Effect: a too-powdery (in some cases crumbly) snowball-like structureWarning: Not only will it not set right on the nail, but it would likely also damage your brush by hardening deep within its bristles.
9. Not working on your angles

When applying acrylic angles matter, always make sure to angle your client's nails facing towards you when applying or downward. Work on your angles and see what works for you; it's a trial and error phase.
-
Small Bead. Less Liquid, Higher Angl
-
Medium Bead. Less liquid, 45° Angle
-
Big Bead.
More Liquid, Lower Angle
10. Flooding the side walls

Although your skin contains keratin like your nails, it has various layers which replenish every 28 days. This causes your skin to slough off. Along with the natural oils, your body will try to remove/detach anything that is not part of your body.
In short, the acrylic won't stick to your skin for long. It will turn into a chipped area, likely taking some areas of your nail along with it. This affects the overall shape aesthetic of your nails. It would be best to avoid flooding the sidewalls and work on your acrylic application and nail prep.
11. Pulling your acrylics off

We know that you can pull off any nail design from Ombre acrylic nails to Nude acrylic nails. However, removing acrylics from your nails could cause significant damage.
Acrylics are durable, and they stick to your nails firmly. However, by pulling them off, you may also remove a little bit of yourself. It would cause brittleness, chipping in areas, and even nail holes.
12. Not cleaning your brush after use

Clean the brush with a tissue after each bead placement since monomers harden, leaving no exception in between the bristles of your favorite acrylic brush. Gently clean your brush with tissue to prevent buildup.
Acrylic nail designs are here to stay, and as a nail tech, you want to be an expert on doing acrylic nails for your clients. Acrylic nails are easy and fun to do once you have mastered them and avoid the common mistakes newbies make. You can join our iGel Beauty Facebook community to get more acrylic nail inspiration and learn the best practices in the nail industry.


