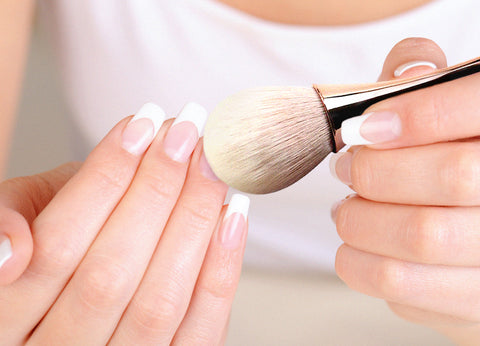
What is a Dust Brush?

A Dust Brush is a nail tool used during nail prep or acrylic or dip powder nails. It can get dusty whenever you're working on a nail set; therefore, a Dust Brush helps you work efficiently with a simple sweep.
This fluffy nail tool has a soft texture, but its bristles are sturdy enough to remove any excess powders. You can choose from our best-selling Dust Brushes that come in two shades: Rose Gold and Gold.
How to use a Dust Brush?
Step 1:

During your nail prep, you can use your Dust Brush to remove dust from your e-file or acrylic nails.
Step 2:

Sweep the Dust Brush onto the nail's surface to remove the dust. You can also use our Phantom Pro Dust Collector to ensure your nail desk or workplace is clean and dust-free!
How to clean a Dust Brush?
You can read our how-to blog on cleaning nail art brushes here.
Step 1:
With lukewarm yet soapy water, you can wash your Dust Brush bristles for 15 minutes to remove the dirt and dust. Never use boiling hot water to clean them since it will ruin the fluff texture of your beloved Dust Brush.
Step 2:

Use a debris-free washcloth to tap the Dust Brush gently. Be gentle when doing so; avoid pulling the bristles or roughly tapping them.
Step 3:

You can hang your Dust Brush to dry or leave them on a damp washcloth for 4 hours. You can DIY by hanging your Dust Brush. Make sure the bristles are hanging upside down to avoid any bristle dents. Run your fingers on the strands to check if it's still wet.
How to remove gunk buildup on your Dust Brush:
Gunk buildup happens on your Dust Brush if your acrylic or any medium used is damp or under-cured. As a result, the medium is forced into the brush's bristles or allowed to rest there. You might try soaking and rinsing the impacted area with a monomer to remove them gently.
Try using acetone on the afflicted area if it has hardened. But it could also impact the dust brush's general quality. Keep in mind that acetone dries bristles when left on for too long and to be cautious and patient when removing the buildup gunk.
Step 1:

Find out where and how much of a buildup there is. You could try using a wooden cuticle pusher to gently scrape the impacted bristles off if the texture of the brush is sticky and not relatively rigid yet.
Step 2:

Use acetone as a final resort if the buildup is hard and resistant, and then carefully scrape the acrylic off. Place your brush halfway down; doing so could cause it to distort or harm the handle or attachment of the Dust Brush.
Step 3:
Dry the brush by gently patting and twirling it over a lint-free cloth. If the acrylic remains hard, you can try the technique again. But be aware that acetone is a strong chemical that could change the delicate structure of your bristles.
How to reattach the handle of the dust brush if it's pulled off:

If you had placed your brush in anything like a monomer or acetone, the handle might have loosened or gotten off completely. To resolve this, you may try sticking it back together with a solid adhesive.
Our Dust Brushes will make you blush! With its beautiful shades and easy-to-use features, you’ll easily be addicted. Join our iGel Beauty online community to be updated on our latest product launches and product demos! See you there!


